Wednesday, March 18, 2009

More Example Webquests

I realized one of the major things lacking in my presentation on webquests the other day was in my examples. All four of my example webquests were geared towards middle or high school students. Webquests can be an effective tool for elementary students also. I wanted to show you some examples. Please feel free to ask me for any further clarifications or ideas.

Kindergarten - 2nd Grade

Tree Webquest
Skip Counting Webquest
Fish Addition Webquest
Memorial Day Webquest
Food Chain Webquest
Bug Webquest


Those examples are just a scattered handful. Quest Garden allows you to search by grade level, subject, or specific topics.

Sample Webquest - Letters

An interactive webquest designed for kindergarteners.
Introduction:
Welcome boys and girls to an exciting, interactive webquest where you become the teacher! A teacher's job is very important, so... I hope you are up to the task.

Task:
You have a new student in your class. This student needs your help to learn the letters of the alphabet. As the teacher, your job is to work through the fun alphabet games in this webquest with your new student. Then, you must determine how well your new student does in learning to recognize the letters of the alphabet, match capital letters to lowercase letters, put the letters in ABC order, and learn the sound each letter makes.

Process:
Here are some great educational sites that will help your new student meet each goal listed above. The sites are in order so that the student will be progressively challenged as he/she moves through the activities.

1. First, let's get started with Elmo. Elmo wants to play Elmo's Keyboard-O-Rama with you. Click on the green button to begin the game. Just press any letter on the keyboard and Elmo will tell you the letter and something that begins with that letter. Be sure to tickle Elmo before you leave his game.

2. Now, it is time for some Alphabet Action. Click on the green arrow to see each letter in action.

3. Okay, since you are now an expert in identifying the letters of the alphabet, it is time to match capital letters to lowercase letters. Try your hand at working an Alphabet Letter Puzzle. As you match the capital and lowercase letters the computer will show you a piece of the puzzle. See how many puzzles you can work.

4. Next, we are off to Paw Park. There are some confused kangaroos at the park. They need to find their Mommy's and Daddy's. Match the capital and lowercase letters to help the kangaroo kids find their parents.


5. Now that you are letter experts, it is time to have some fun with Alphabetical Whack-a-Mole. This game is so much fun. Whack the moles on the head with the hammer but, be sure you whack them in ABC order. As you whack each mole, the letters will appear in a line at the top of the screen.

6. It is time to learn the sound that each letter makes. Big Bird wants to help with his game, Letters to Big Bird. Big Bird is going to check his mailbox for a letter. You must tell him the things he has that begin with that letter.

7. You are almost finished, but not before we take a trip to Disney.com. JoJo wants to play JoJo's Letter Sound Dash with you. She wants to race you the finish line by matching letters to the sound they make.

Evaluation:
A teacher's job is never done. Now, it is time to decide how well your new student did on this Alpha Quest. Please click here and use the rubric to score your new student.

Conclusion:
Congratulations on you first assignment as a teacher. You did a great job leading your new student through this exciting webquest. I know that your new student had a wonderful time playing these fun, interactive games and I am sure he/she learned a great deal. Letter recognition is an important skill. It is the first step to becoming a reader! I hope you enjoyed being a teacher for a short time. I also hope you will come back often to practice letter recognition and "teaching".

Teacher Notes:
This webquest is designed for kindergarten age children and will require a parent or teacher to guide them through.

Sample Webquest - Brain Images


Introduction
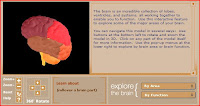
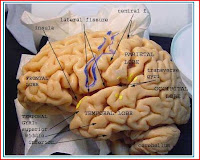
Our textbook provides us with a few images of the brain and its structures. These images are mostly drawn. Today we want to find other images, photographs and drawings. We want to use these images to learn more about the different structures that make up our brain.

Task
You will be exploring several websites that I have found for you, find a few websites of your own, and then choose your five favorite images of the brain. You will then create a Power Point project using these five images. You will write information about these images to accompany the Power Point presentation.

Process
1. You are going to begin your exploration by visiting a set of websites that I have found for you. They are listed in the resources section. All of these sites allow for some exploration into and interaction with the parts of the brain. Make sure you take plenty of time on each of these tutorials.

2. Now it is time to explore some websites that will show you some detailed images of the brain. Again, spend plenty of time exploring these websites.

3. Now you need to explore some websites and find at least three images of your own choosing. Be sure to record the URL of the site where you find each image. (Do you have a del.icio.us account? You could store your URL's there.) The images we find on websites are not our own; we need to give credit to their source.

4. The next step is to make a Power Point presentation using the images you discovered on this journey and the information you learned along the way. In the evaluation section you can see a rubric that will be used to evaluate your presentation. Here are some specific items to keep in mind:
a.) You need to include at least five images found during this webquest. Three of them can be from sites that I provided you with and two of them should be from your own search.
b.) Credit will need to be given to the source of each image.
c.) When each image is shown during your Power Point presentation, you need to include information about each image in the "notes" section of your Power Point file. This should include: 1. The name of the overall brain part shown in the image
2. The names of any specific brain structures that are shown in the image (even if they are not labeled)
3. The functions of these specific brain structures - Be Careful: If I see a brain structure in your image that you should have mentioned (because it was mentioned in class) and you didn't mention it, you will lose points. You can use your book to find information about each of the brain structures or go back to the interactive tutorials at the beginning of your webquest! The descriptions should not be word for word from the book.
4. The URL from where you find your image.


Resources

Section 1 - Tutorials
Get Body Smart Interactive Brain Tutorial
You need to explore the following sections of this website: major divisions of the adult brain, sectional views of the brain, organization of the cerebrum, and cerebral cortex
Secret Life of the Brain: 3D Brain Anatomy
You need to take a 3D tour of the brain. Look into all of the parts by area and all of the parts by function.
Brain Facts from National Geographic
Go ahead and read the intro, interact with the brain anatomy and unhealthy brain sections, and look into the stimulate the brain section.
Brain Model Tutorial
Click on all the pieces of the brain that we discussed in class.

Section 2 – Image Collections
Brain Connection
Brain Images - This site is actually more of a portal, listing many links to other sites with brain images. Spend some time looking at a minimum of three of these sites
Brain Photographs - Look into a variety of these links, at least five
More Brain Images
Final Image of an Actual Brain

Evaluation
Click here to download the rubric for the webquest.

Conclusion
Make sure you follow the instructions given, read the rubric to find out how you will be evaluated, and take the time necessary to do a thorough job with research and descriptions.

Teaching with Webquests - Part 2

Here are the slides from our training session on Webquests the other day. I've included the links on each slide below the image:
Slide2

Teacher’s First Tutorial

Slide3

Slide4

Slide5

Social Security
The Roaring 20’s
Webbie Awards
To Kill a Mockingbird

Slide6
Slide7
Slide8

Looking at the “Task” more closely

Slide9

QuestGarden.com
WebQuest.org
Best Webquest.com

You can also download the handout from this training session by clicking here.

Monday, March 16, 2009

Teaching with Webquests


Click here to download the handout from this training session.

Sunday, March 15, 2009

No Hassle Jeopardy

I just found a resource that has got to be one of my favorites of all-time. http://jeopardylabs.com/ This site allows you to customize your own jeopardy board and game. You put in the questions and the answers, and it handles the rest. You don't have to register; you don't have to save anything to your computer. It gives you a "url" address where you would access the created game. You could then play it as a whole class review activity; it even keeps score for you! Or you could post the link to the game on your class blog, and students could play from learning centers or from home. Excellent, easy, and free.

I will admit that this jeopardy doesn't have a lot of bells and whistles (sound, fancy graphics, etc.), but with all the pros that I just mentioned, I think we can handle the cons. Check it out for yourself, and let me know what you think!

Tuesday, March 10, 2009

Revealing Information within SMART Notebook

Have you tried all of these ways to reveal information in SMART Notebook? Feel free to comment with other ways that you have used.

1. Dragging an object out of the way
2. Erasing to reveal - cover your text or objects with a marker drawing the same color as your background. You can then use the eraser to rub away the invisible drawing and your object will appear. It will look like you are using a magic eraser, or a reverse eraser.
3. Click and Reveals from the gallery
4. Using "Shrink and Grow" animation to reveal hidden text
5. Revealing by color


6. Flippers from the gallery
7. Balloon pops
8. Revealing by ordering/layering


(Thanks to Jim Hollis at Teachers Love SMART Boards for providing some of the ideas in this list.)

Sunday, March 8, 2009

Teaching with Blogs

Here is the Google Docs Presentation that I will use to teach the LCS staff about blogs.

You can also access the presentation complete with notes here. To view the speaker notes, click on the mouth with plus sign icon in the bottom right corner of the google docs screen.